From rooted Evo 4G to Unrevoked Forever + Froyo
Thanks to a clever Sprint employee who secretly stockpiled the coveted phone for new customers, I've had an Evo 4G since the day after it was released. Despite foolishly accepting the first OTA upgrade, I was still able to use the original Unrevoked to gain enough root access to get android-wifi-tether working (thanks to this XDA thread), which has been fantastic while traveling.
 It's been over two months, and the release of Froyo and Unrevoked Forever motivated me to do some upgrading. The following is the step-by-step tutorial I wish I'd had going into the process. The assumption is that you've rooted, but not using Unrevoked3. The entire walkthrough is written with the goal of being as simple as possible for users who are new to doing their own updates, flashing new images, or even using Ubuntu.
Unrevoked3 on Ubuntu (9.10)
Installing Unrevoked3 on the Mac is easy-- you download an installer package, drag it to Applications and run it. If you're on Windows, I'd recommend using Ubuntu LiveCD with instructions by shad0wf0x. Since I run Ubuntu (Karmic/9.10, but should work equally well for Lynx/10.04), here are some instructions:
- Download Unrevoked 3
 Unzip reflash.tar.gz (you can double-click on it to open File Roller, and hit the extract button); the result is an executable called reflash. Let's assume you extracted it in your Downloads folder. Now, run it as root by opening Terminal (Applications > Accessories > Terminal) and typing in
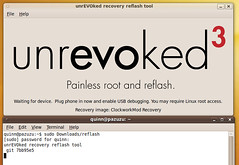
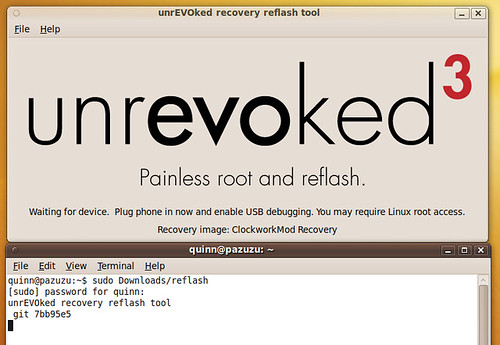
 sudo Downloads/reflash. It'll ask you for your password, and then it'll launch Unrevoked3.- The UI that comes up has the Unrevoked logo and the message "Waiting for device. Plug phone in now and enable USB debugging. You may require Linux root access."
- Enable USB debugging on your Evo by going to Settings > Applications > Development > USB debugging and plug in your phone.
- From there Unrevoked3 just runs-- it reboots a couple times, and drops you off in ClockworkMod recovery (a dark-colored screen with greenish text.) Select "reboot system now" by pressing the power button, and your system will restart.
Radio baseband and Wimax updates
When I compared my radio baseband version to those supported for Unrevoked Forever, I was dismayed to discover that mine wasn't listed. Time for a radio update, and a Wimax update for good measure. Conveniently, after I installed these two updates I no longer had to remove the battery before I could turn my Evo on after turning it off-- an annoying quirk that'd plagued me since I got the phone.
How can you tell what baseband version you're running? You could restart your phone while holding the "volume down" button like the Unrevoked folks suggest, but it's easier to look in the Evo UI: Settings > About phone > Software information > Baseband version.
- Go to this XDA thread and download Radio update: 2.15.00.07.28 and Wimax Update 26023 from the first post. These are two zip files, Radio-2.15.00.07.28.zip and Wimax26023.zip. Save them to the root of your SD card.
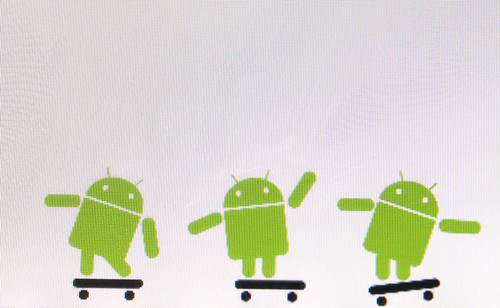
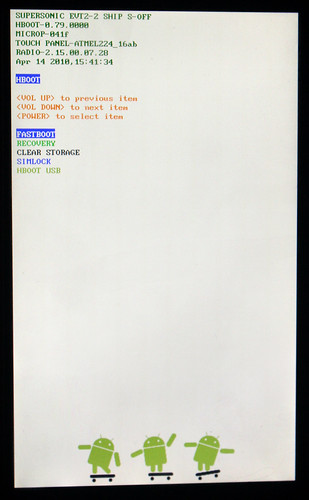
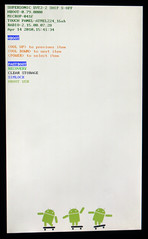 Turn off your phone, and turn it back on while holding the volume-down button. This will take you to the bootloader, a white screen with some Androids on skateboards at the bottom.
- The instructions say you can use the volume keys to navigate between options; on my Evo, it wouldn't let me do this for a few seconds, then it'd run HBOOT (a bunch of green text saying it's looking for various things and not finding them), and when HBOOT couldn't find anything then it would let me navigate to the other options.
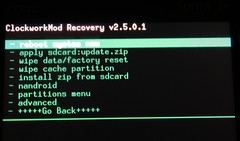 Choose Recovery, and press the power button. This will launch ClockworkMod Recovery (the same dark screen with green text as before.)
- Select install zip from sdcard, then choose zip from sdcard. Scroll down until you see either of the update zip files you've just added to your SD card. (Depending on how many files and folders you have on the root of your SD card, this may take a while.)
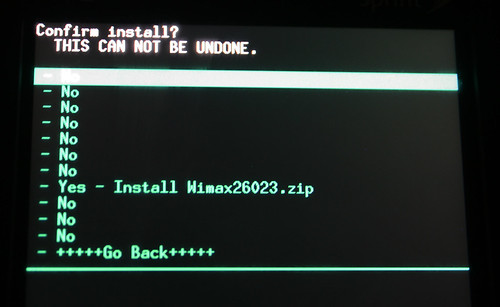
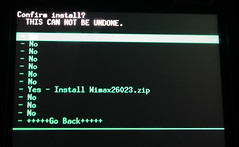 Select the update zip file, scroll through all the "no"'s and select "yes". The update will run.
- Be sure to reboot after each update-- select +++++Go Back+++++, then reboot system now
- Repeat this same process with the other update zip file.
- To double-check if the update went through, check on your radio baseband version again, like before.

Unrevoked Forever and custom splash screen
One of my irrational fears is that one morning, as the alarm is going off on my Evo, I'll fumble and accidentally hit the button accepting an unrootable OTA update. With Unrevoked Forever, you can still flash a custom recovery image if that happens, so I went to install it. (Update: it also lets you install AdFree, which you can't do with a normal Unrevoked root.) This step isn't necessary if you just want a rooted Froyo.
- Download the latest version -- it's a zip file, just like the radio and Wimax updates-- and put it on the root of your SD card.
- Follow the same process as before, using ClockworkMod Recovery to install zip from sdcard.
 When you reboot, if you hold down the volume-down button and go into the bootloader, you'll see SUPERSONIC EVT2-2 SHIP S-OFF at the top if it's been successful.
- If you want a custom Unrevoked splash screen (their Unrevoked Forever logo in black, very tasteful, which will replace the HTC Evo 4G logo on startup), download PC36IMG.ZIP from their website. Put that exact file, same filename and all, in the root of your SD card.
- Reboot into the bootloader (holding down the volume-down key); this time, HBOOT will find what it's looking for when it runs, and it will ask if you want to start the update. Choose 'yes', and then say yes to rebooting the device.

Installing rooted Froyo
I didn't want to re-install all my apps and reconfigure my phone from scratch, so I first went in search of a backup option.
- Backing up your data: download and install MyBackup from the Marketplace. (The free version should be fine, so long as you're not planning on taking more than 30 days to finish this tutorial.)
- Choose Backup, then Applications (or Data-- you'll probably want to do them both), then Local (SD Card). Select the apps you want to backup, give your backup a name and choose APKs + DATA. The process is essentially the same for backing up data.
- Acquiring the ROM: Download HTC OTA Froyo 2.2, *FINAL*, build 3.36.651.6 (Rooted) Odexed from the first post on XDA. It's about 167 MB. Move it to the root of your SD card.
- Flashing the ROM: download and install ROM Manager from the Marketplace.
- Select Flash ClockworkMod recovery-- it's counterintuitive, if you've already run Unrevoked3, but necessary. Confirm your phone model, confirm the Superuser Request, and the app will do the rest of the work.
- Choose Install ROM from SD card and select the Froyo ROM you previously downloaded. It'll give you check-box options for backing up your existing ROM and wiping the phone; certainly agree to wipe it, and you might want to back up your current ROM just to be safe.
- This will reboot your phone into ClockworkMod Recovery, where the backup, phone wiping, and Froyo installation will happen
- When the Froyo installation is done, your phone will go black, and you'll see the HTC logo in Android green. My screen flickered to the horrible rainbow-colored default home screen for a moment, before going back to the HTC logo, when it kicked me into the setup screens for Froyo (using the onscreen keyboard, whether or not to allow Google location services, configuring e-mail clients, etc.)
- Getting your stuff back: download and install MyBackup again, and this time choose Restore. You can choose between Applications and Data, and then select the backup you made before.
- Restoring from MyBackup will return all of your apps and data, including your home screen layout and saved logins for your apps. I still had to re-configure the home screen for my browser, allowing the installation of non-Marketplace apps, etc., but it still saved me a lot of time.
- Wifi tethering: Froyo's native wifi tethering is still under Sprint's thumb, but android-wifi-tether didn't let me down-- I installed wireless_tether_2_0_5-pre8.apk, and it works great.
Addendum: I initially had problems connecting to 4G after doing all this, and it seems I wasn't alone. The fix, helpfully suggested by cyberenz on the XDA forum, is to re-flash the Wimax update.
Many, many thanks to the Unrevoked team: Matt Mastracci, Eric Smaxwill, Matthew Fogle, Joshua Wise, Ryan Pearl, and Koush Dutta. Not only do they do incredibly awesome work, they also direct all donations to the Electronic Frontier Foundation. You guys are my heroes.